Source: Unsplash
If you have marble floors at home, you probably chose them in the first place for the visual attractiveness and durability. That is, if your marble floors are well taken care of. Despite how durable and lasting marble is, regular cleaning and maintenance is essential to protect it from wear-and-tear or other damages. In this article, we take you through a step-by-step guide on how to polish marble floors and help restore to its former glory.
What is marble made of?
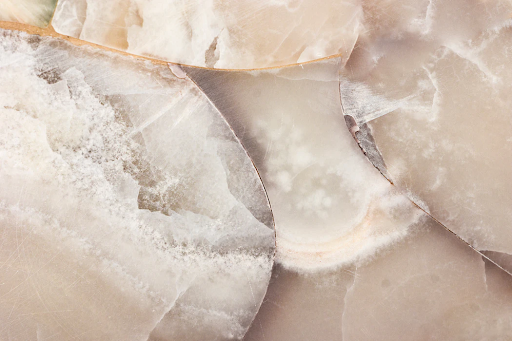
Marble is made from high-alkali natural stone minerals, which can cause it to be prone to staining and leaking. Surface corrosion can cause marble to lose its smooth surface. It forms an etch that’s darker than its original color, producing dulled spots.
Getting etches in marble doesn’t mean it’s ruined forever. There are ways to remove them and restore damaged marble. Regularly cleaning marble floors and treating them with proper care help protect them from damage. This will keep it looking its best.
What type of marble are you polishing?

Before we get started, we need to identify the type of marble we’re polishing. There are generally 2 main types: natural marble and cultured marble. If you’re unsure, contact your contractor or use the following steps to check.
Natural marble is cooler to the touch, while cultured marble will feel around the same temperature as the surrounding air. Natural marble also is more vulnerable to scratches while cultured marble is a bit sturdier.
What kind of cleaning solution can I use?
You can’t go wrong with a good cleaning routine for marble floors. But, it can be prone to damage if you use the wrong chemicals.
Most conventional, store-bought cleaners are not very suitable for delicate marble and we should always avoid them as much as possible. Use an alkali cleaning solution such as hydrogen peroxide or ammonia to prevent the marble from reacting.
Remember to select a cleaning solution that is suitable for your marble floor and the exact makeup of your marble tiles. If you have dark marble, avoid using strong solutions and dilute the cleaner with water to create a pH neutral solution.
Step 1: Preparing the marble surface for a deep clean
Before you begin polishing your marble floor, make certain that it has been well cleaned. No, we’re not talking about vacuuming up dust and wiping up spills on a daily basis. A deep clean is required if you want your marble floor to truly sparkle.

Use a clean, dry cloth or a soft dust mop to remove dust and dirt from your marble floors. Be sure to not drag the cloth or brush the floor hard to prevent it from creating scratches. You can use plain water or a more thorough cleaner that’s made for marble.
A dilute ammonia solution is best for cleaning the floor. Make a small amount of ammonia into a gallon of warm water. This method will not leave a strong odor.
If your marble is dirty, try mixing 2 tablespoons of ammonia with 1 quart of water or mixing baking soda with ammonia to make a paste. Never scrub or use abrasive tools on the surface.
Step 2: Removing stains
For natural marble, if there are stains, simply use a moist sponge and mild hand soap to gently rub the stain away. Afterwards, use a clean damp cloth to remove the soap and then dry it. For stubborn stains, you can use a poultice.
You can use a commercial marble stain remover (also known as poultices) or prepare your own for particularly stubborn spots. To make your own homemade poultice, combine a tablespoon of ammonia with half a cup of hydrogen peroxide, then gradually add just enough baking soda to make the mixture thick and creamy (similar to peanut butter or sour cream).

Using a clean paintbrush, spread the poultice over the stained regions until you’ve acquired the desired texture. Cover the stain to a depth of 1/4 to 1/2 inch and spread at least an inch beyond the stain’s borders. Cover the poultice with plastic wrap (securing the edges using masking tape) and set aside for 12 to 24 hours, or until it has completely hardened.
Remove the plastic cover when the poultice has dried completely and carefully scrape the poultice away with a razor blade or spatula. You may also wet the poultice with half a cup of water to make it easier to scrape (but be careful not to dig into the marble!) With a clean wet towel, wipe away any leftover poultice residue, and then wipe the marble clean.
Step 3: Polishing the surface

While severe etching necessitates the assistance of a professional, minor etching may typically be removed with a polishing powder purchased at your local home improvement store. Tip: If you want to be safe, find out which marble polishing powder your marble manufacturer recommends.
Start by dampening a clean towel and cleaning the engraved areas. Apply a little amount of marble polishing powder to the etched marks and rub in gently according to the product’s recommendations. To remove any residue, wipe your marble with a clean, damp towel and dry it to show its newly restored sheen.
Step 4: Seal
It is better to avoid than to treat. If you want to assist your marble floor survive serious stains and preserve its shine, seal it at least twice a year. Talk to your manufacturer about the best products and techniques for your marble floor if you get the chance.
After purchasing the proper marble sealer, apply it straight to the marble’s surface by spraying or pouring. Spread a clean, dry towel across the whole marble floor and soak for the amount of time indicated on the product’s bottle (though typically it would take five minutes or less).
After that, use another clean, dry cloth and use circular movements to buff the sealer into the marble. Continue polishing until the sealer has absorbed into the stone fully and the marble feels dry to the touch. When it feels absolutely smooth and there is no crusty or sticky residue behind, you know it’s entirely dried.
Step 5: Maintaining the shine

Dry clean on a regular basis – To keep your marble floor looking shiny for longer, give it a routine dry clean using a dry mop or soft cloth. Once a week should be enough if you live alone. If you live in a home with four or more people, you’ll almost certainly have to dust the floor on a daily basis. This is to avoid dust accumulation, which, if left unchecked, might result in small scratches.
Remove spills as soon as possible – If an accident occurs, make sure to clean it up as soon as possible to avoid the liquid seeping into the marble’s crevices and causing a tough discoloration. Marble is a porous rock, meaning it can easily absorb fluids.
Always blot, never scrub – When dealing with stains, it’s important to remember to always blot rather than scrub. Spills should be flushed with plenty of water to neutralize pH levels and prevent stains or etches. When dealing with stains caused by acids such as citrus, tomato, vinegar, and coffee, this is very crucial.
Consider carpets and rugs for high-traffic areas – Consider carpets or rugs for your floor in high-traffic areas. These are not only attractive additions to your house, but they will also protect your floor from dirt, sand, and other abrasive particles.
Maintaining and caring for your marble

It’s important to keep your marble in its best condition by regularly cleaning it. Follow a simple rule of thumb: the more traffic and more people living in the household, the more cleaning your floors require.
Over time, constant wear and tear dulls the polish of a marble surface or floor. But with a little tender loving care, you’ll be able to bring it back to its former glory immediately. Keep these suggestions in mind for your next marble polishing session.

